

A workflow breaks down complex tasks into ordered steps to reduce system complexity. In Alibaba Cloud Model Studio, workflows let you combine nodes, such as large models, APIs, and Function Compute, to reduce coding costs.
Application
Why use a workflow application
A workflow breaks down complex tasks into a sequence of steps to reduce system complexity. Creating a workflow application on Model Studio lets you define the execution order, assign responsibilities, and specify dependencies between steps to automate and optimize the process.
Common use cases for workflow applications include:
- Travel planning: You can use a workflow plugin to select parameters, such as a destination, and automatically generate a travel plan that includes flights, accommodations, and attraction recommendations.
- Report analysis: For complex datasets, you can combine data processing, analysis, and visualization plugins to generate structured, formatted analysis reports.
- Customer support: You can use automated workflows to handle customer inquiries, including issue classification, to improve response speed and accuracy.
- Content creation: You can generate content such as articles and marketing copy. Provide a topic and requirements, and the system automatically generates a draft.
- Education and training: You can use a workflow to design personalized learning plans with progress tracking and assessments, enabling self-paced learning for students.
- Medical consultation: Based on patient-entered symptoms, a workflow can combine multiple analytical tools to generate a preliminary assessment or recommend relevant tests to assist doctors with further diagnosis.
Examples
Example 1: Detect scam messages
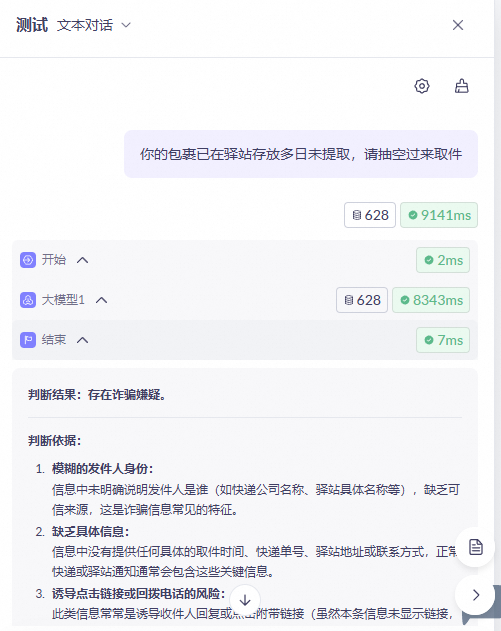
This example demonstrates how to create a workflow application to determine if a text message is a potential scam. The workflow uses a start node, a large model node, and an end node.
| |
|  |
|   |
|  |
| 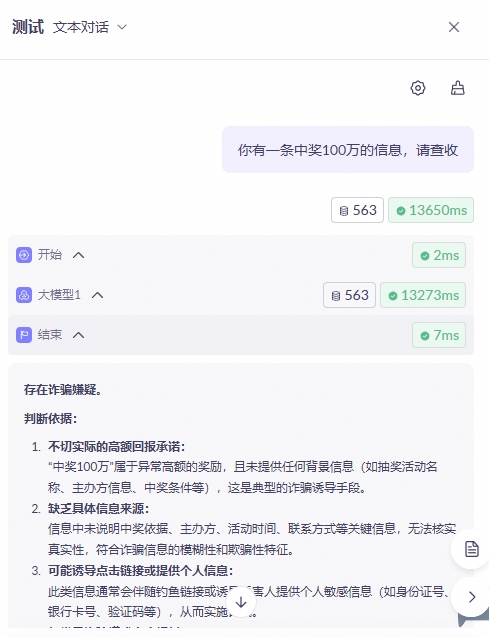 |
 . After the workflow finishes running, view the output.
Example 2: Smart shopping assistant
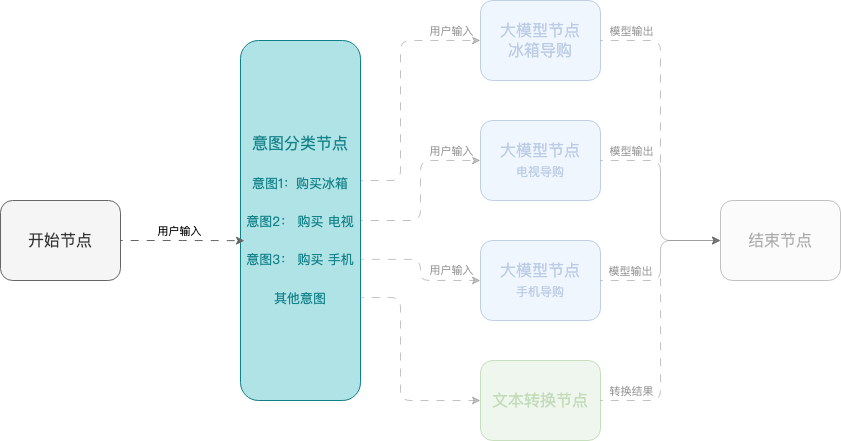
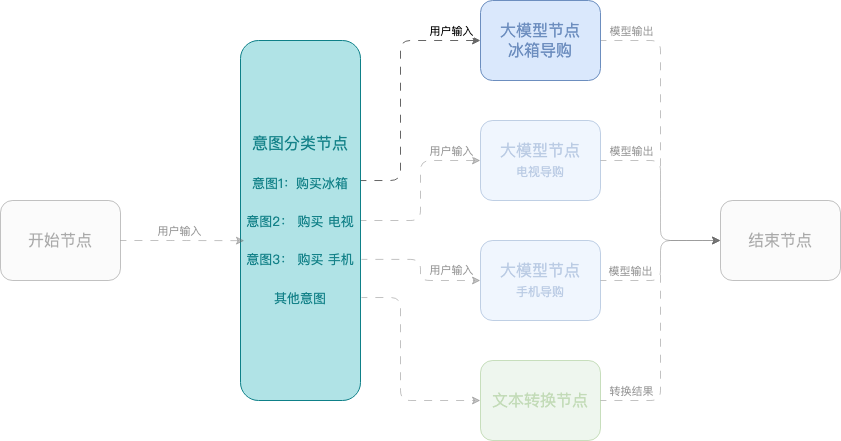
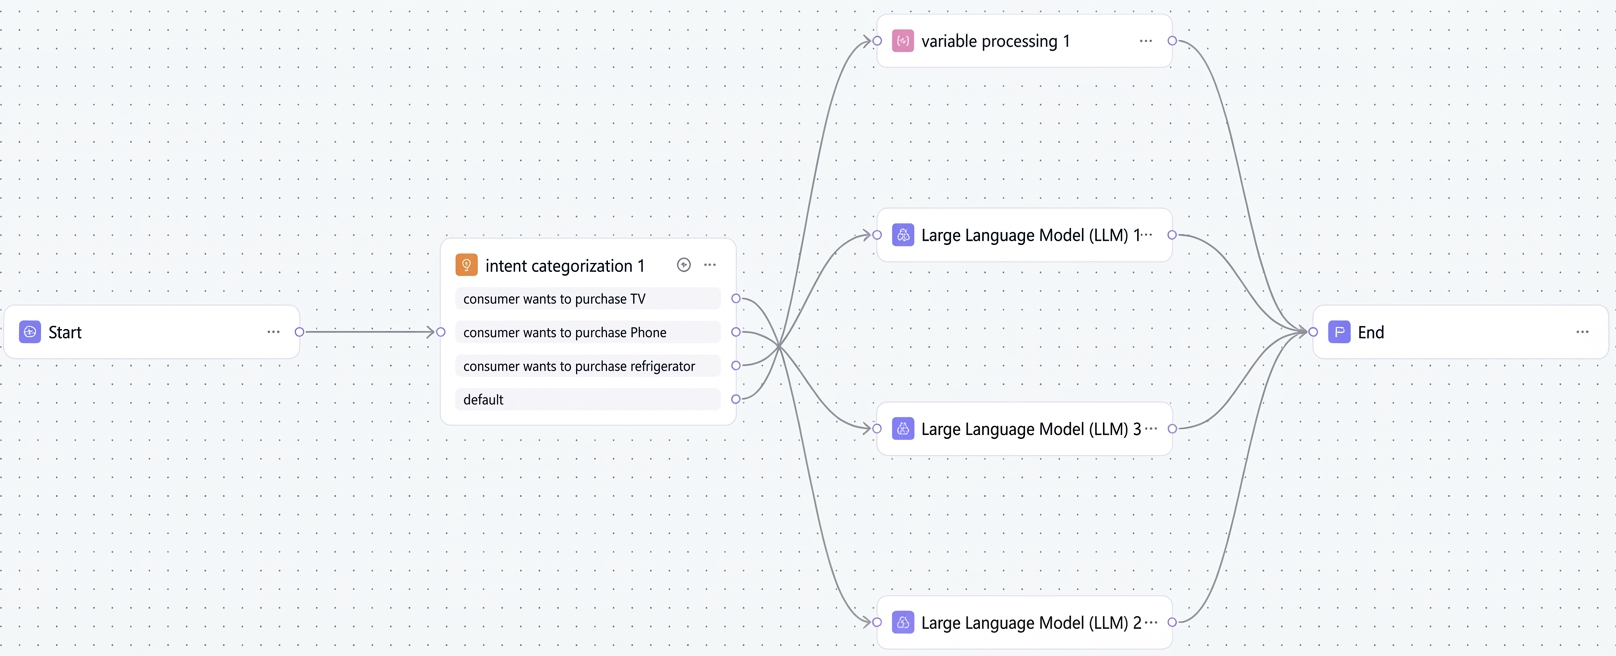
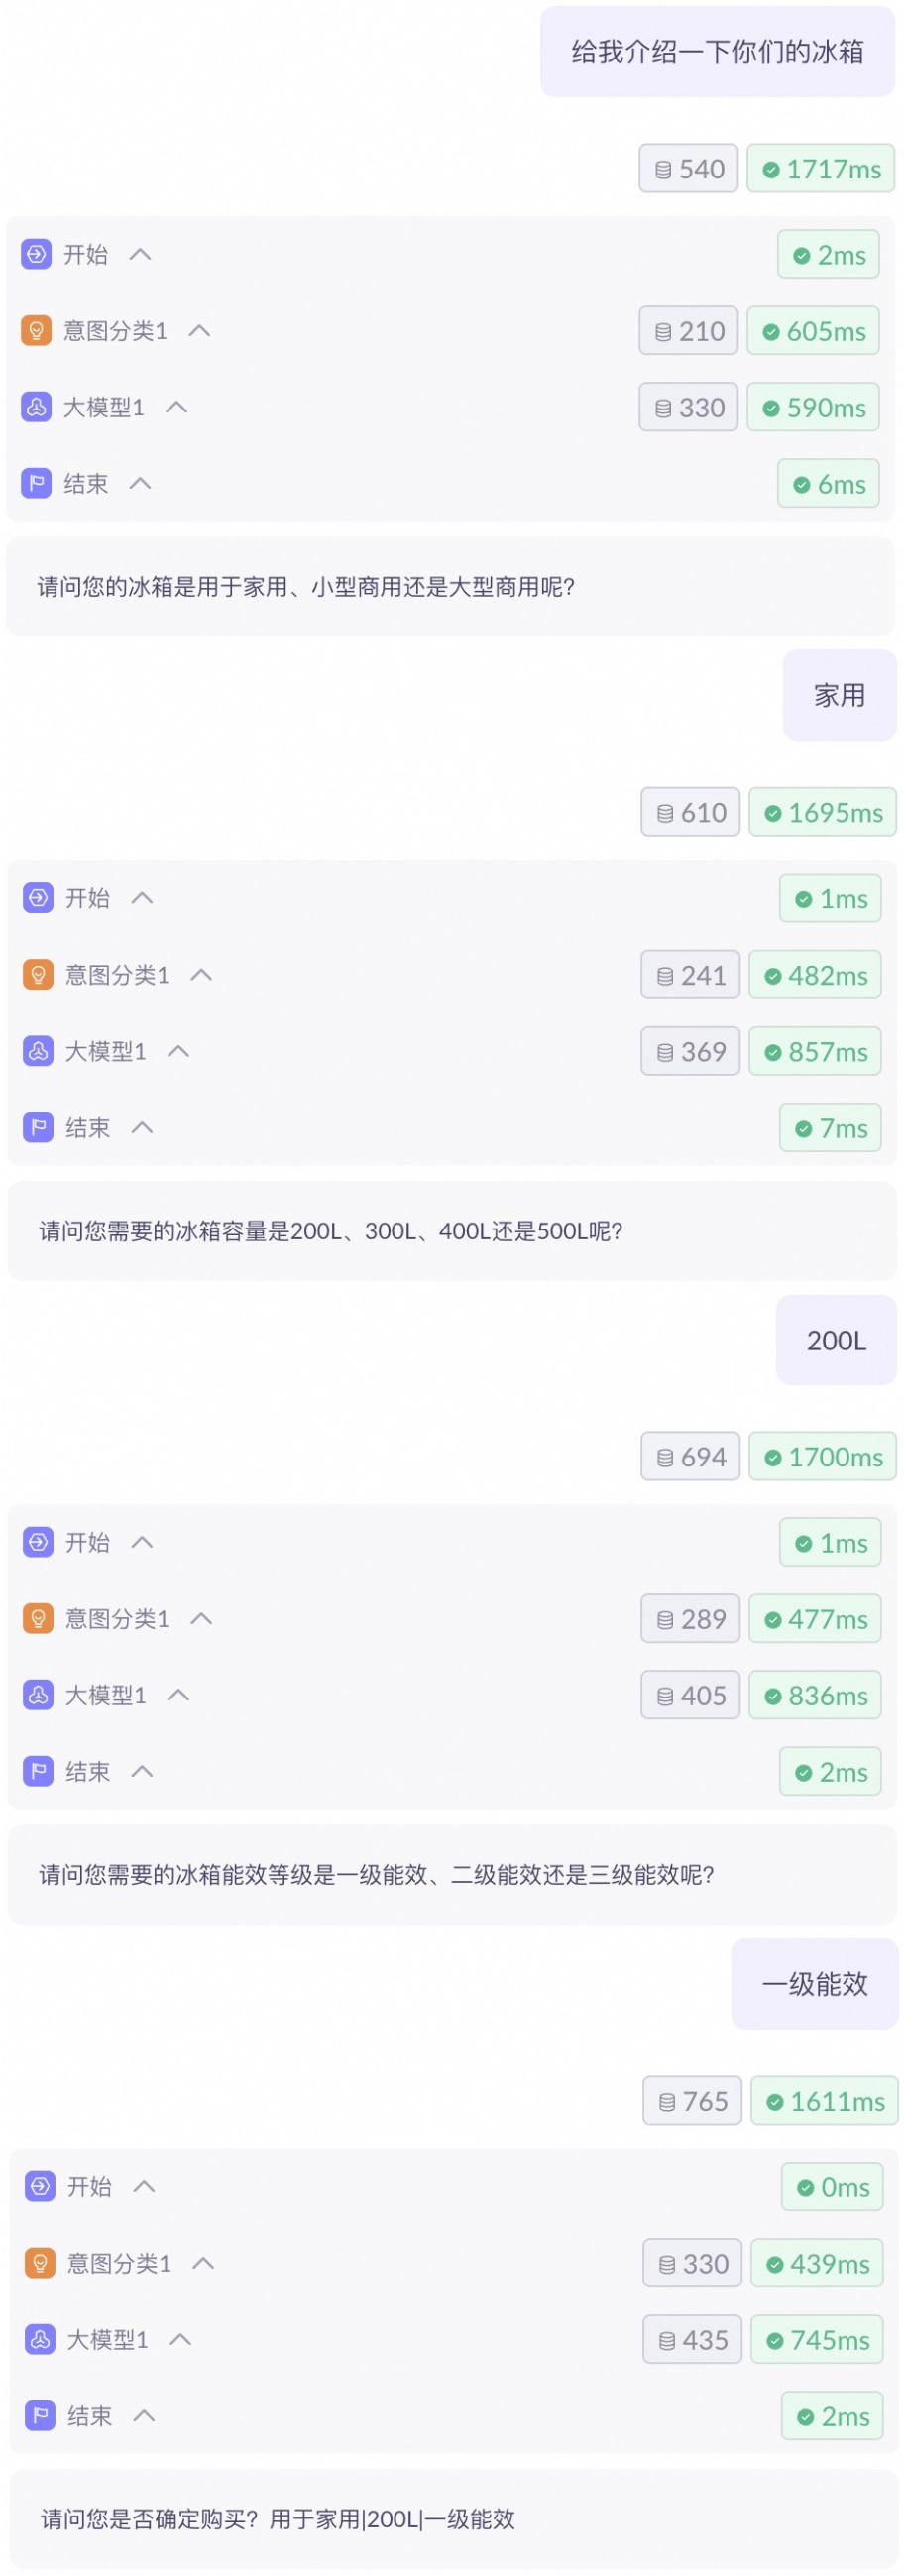
This example shows how to create a smart shopping assistant using a workflow that helps users select mobile phones, TVs, and refrigerators. The workflow uses a start node, an intent classification node, large model nodes, and an end node.
| |
|  |
|  |
| 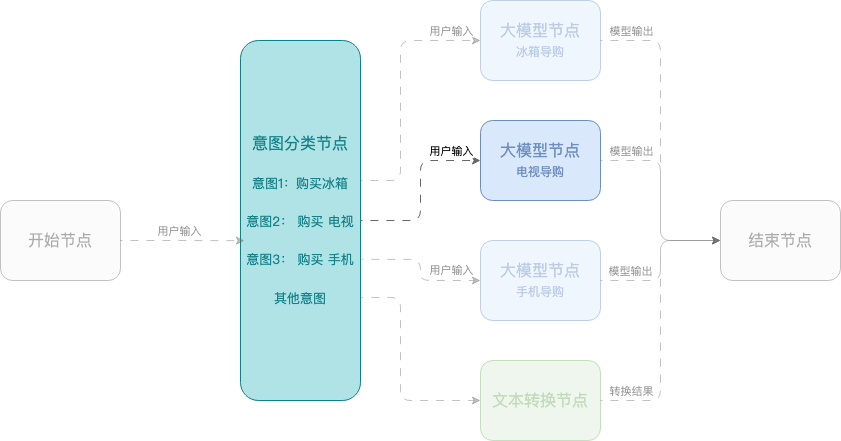 |
| 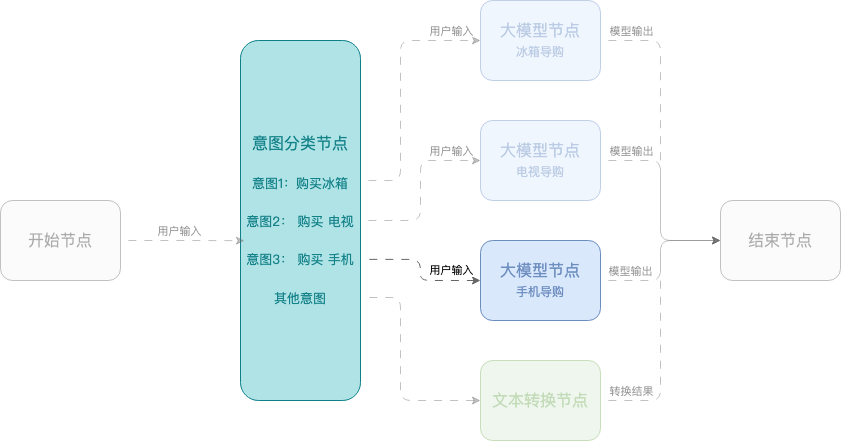 |
| 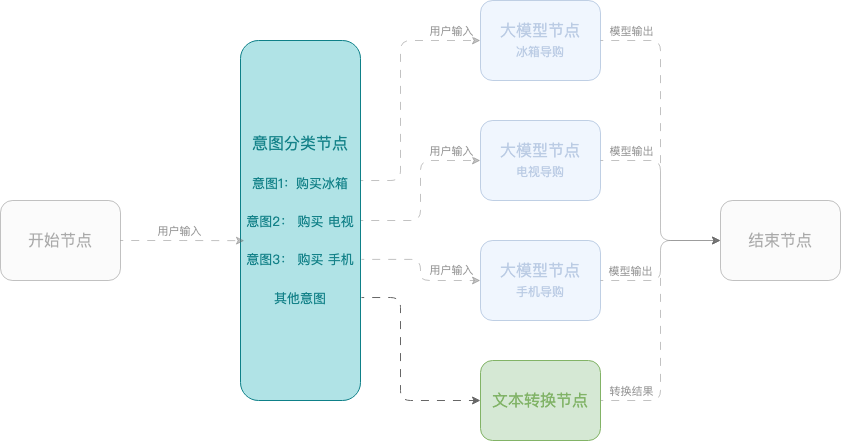 |
| 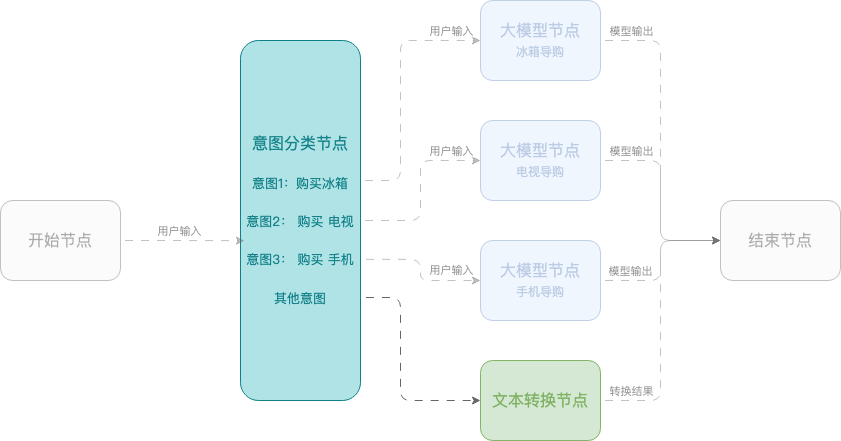  |
|  |
 and select Custom Cache.
Session parameters
A session variable acts as a global variable, storing parameters throughout the workflow's lifecycle to be referenced by any node.
Click the  icon in the upper-right corner of the canvas configuration page.

Node
Nodes are the core functional units of a workflow application. Each node performs a specific task, such as executing an action, triggering a condition, processing data, or directing the workflow. Combine these nodes like building blocks to create automated processes.
- Start and end
- Large model
- Knowledge base
- API
- Plugin
- Function Compute
- Script
- Condition
- Intent classification
- Flow output
- Variable processing
- Parameter extraction
- Agent group
- Create agent
- Multimodal generation
-
When to use
- When designing a workflow, define the structure and content of the input/output parameters in the start and end nodes.
-
How to use
-
Start node
Component
Description
Predefined variables
The workflow provides the following predefined variables to process user input and maintain conversation history:
query: Stores the user's text input.
historyList: Stores conversation history to maintain context in a multi-turn conversation. To use this variable in nodes that support the memory feature (such as large model and intent classification nodes), select Custom Cache.
imageList: Stores user-uploaded images to enable image analysis or multimodal conversation. To use this variable in nodes that support the memory feature (such as large model and intent classification nodes), select Custom Cache.
Custom variables
Custom variables are structured input parameters that you define for a workflow. They receive data from tests or API calls and can be referenced in subsequent nodes. When creating a custom variable, configure the following parameters:
Variable name: Enter a meaningful name. Chinese characters are not supported.
Type: The data type of the variable. Supported types are String, Boolean, Number, Object, Array (of String, Boolean, Number, or Object), and File.
Description: Briefly describe what the variable does and when to use it.
-
End node
Component
Description
Output mode
Text Output: Suitable for unstructured content. In the input box, you can enter fixed content or type
/to reference variables, which determines the final result returned to the user. You can source variables from the output of any workflow node or from session variables. Properly mapping output variables allows you to control the workflow's data flow and ensure an accurate and complete final response.JSON Output: Suitable for outputting structured content in JSON format. You can define variable names and enter text or reference variables.
Streaming output
The Streaming Output switch applies only to Text Output mode.
When enabled, responses from large model and application component nodes are streamed token by token. When disabled, a full response is returned after it is completely generated.
-
Start node
Test application
After you configure the workflow, you can use the test feature to verify that it runs as expected. Click the Test button in the upper-right corner to open the test panel. The test panel offers multiple test modes for different use cases.
Text conversation
Text conversation is the default test mode. It preserves the conversation history and supports continuous, multi-turn conversations.
- From the drop-down list at the top of the test panel, select text conversation mode (selected by default). If the workflow contains custom variables, enter their values in the parameter configuration area.
- In the input box, enter your test content (text and file attachments are supported), and then click the Send button or press Enter to run the test.
- Review the test results. You can click a node to view its detailed input and output, or switch the output format between Text and JSON.
- To continue the conversation, enter your next turn in the input box and send it. To start a new conversation, click the Clear All button.
Text generation
The text generation mode is for single-turn interactions. Each test is independent, and the conversation history is not preserved.
Checklist
The checklist lists the required configurations for your workflow.
To view the checklist, click the  icon in the upper-right corner of the canvas configuration page.

Release an application
Once an application is released, you can call it via an API or share it as a web page with RAM users in the same main account. To do so, click the Publish button in the upper-right corner of the agent application management page.
Call via API
On the Publish Channel tab of your workflow application, click View API next to API to learn how to call the agent application by using an API.
Note: You must replace YOUR_API_KEY with your API key to call the API.

- For invocation methods (HTTP/SDK), see Application call.
- For details on API call parameters, see Application call parameter information.
- For details on passing parameters, see Parameter passing for applications.
- To resolve errors returned by API calls, see Error codes.
- The application itself has no concurrency limit; instead, the limit is determined by the models it calls. See the Model Studio console.
- Use asynchronous mode: In this mode, the system returns a task ID. You can then use the task ID to query the result, which avoids the synchronous timeout limit.
- Split the task: Break down the task into multiple steps, or process batch data in smaller chunks to prevent a single execution from timing out.
Import or export a workflow
-
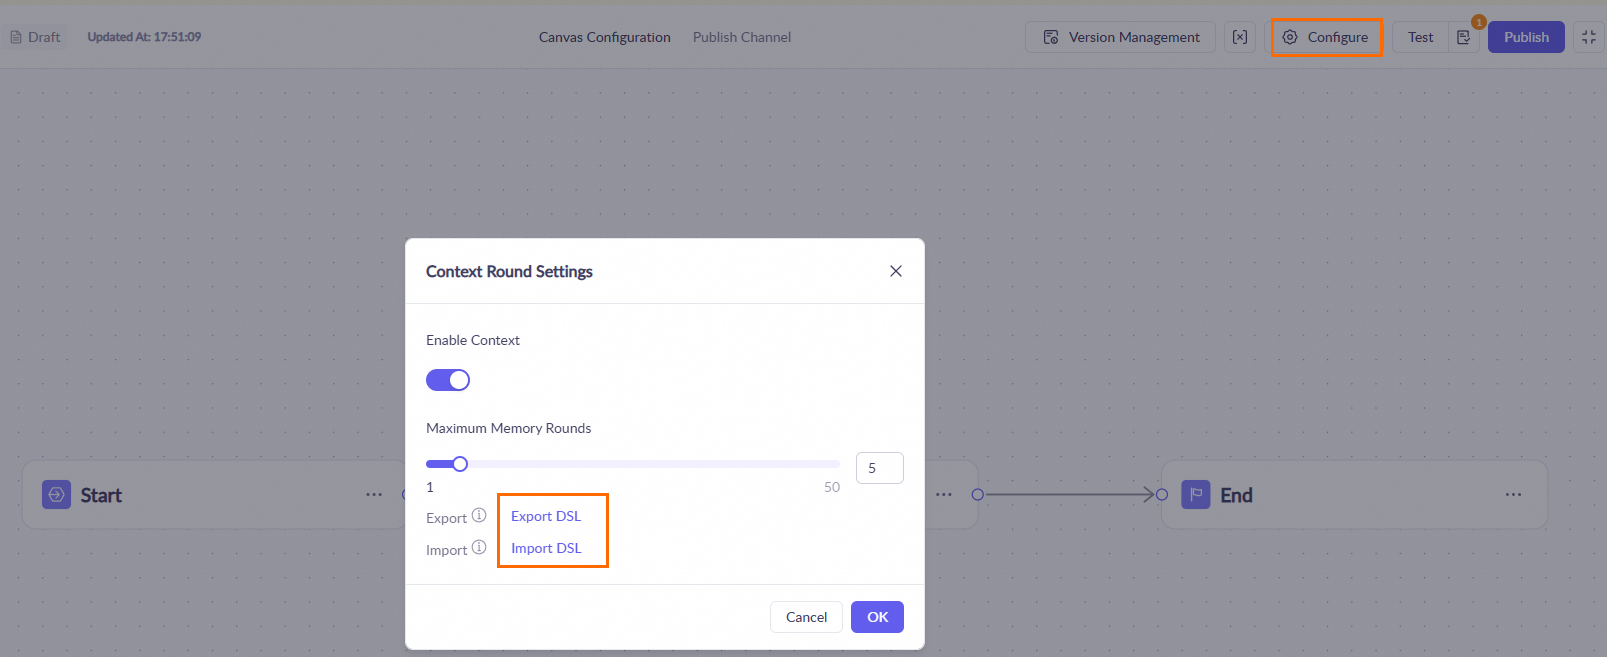
Import or export a Model Studio workflow
Click the
 icon at the top of the workflow page and select Export DSL or Import Model Studio DSL.
-
Import a Dify workflow
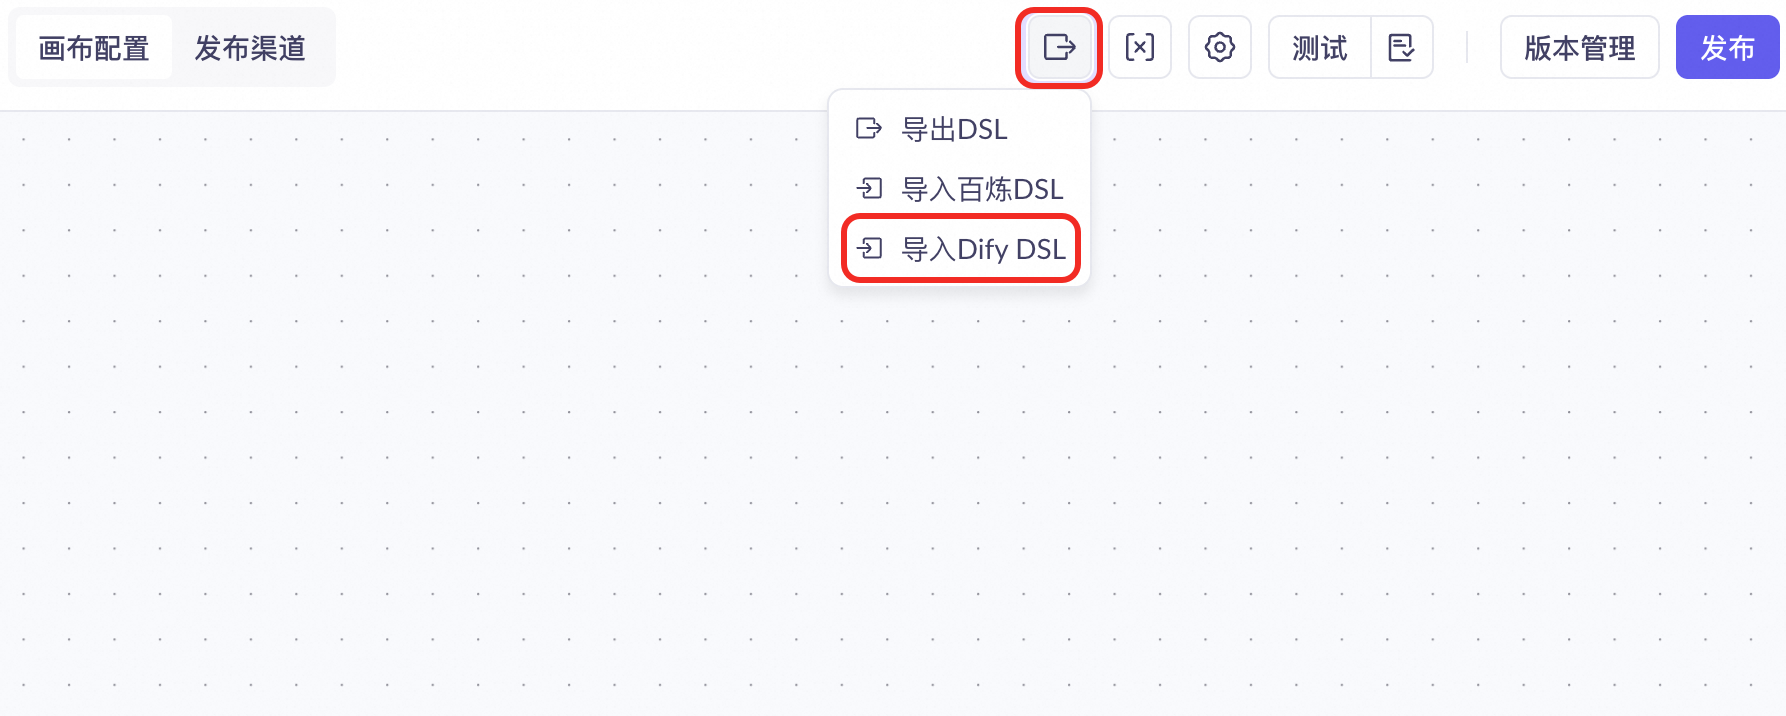
Model Studio supports one-click import of Dify workflows for easy migration and reuse.
-
Click the icon at the top of the workflow page and select Import Dify DSL.
-
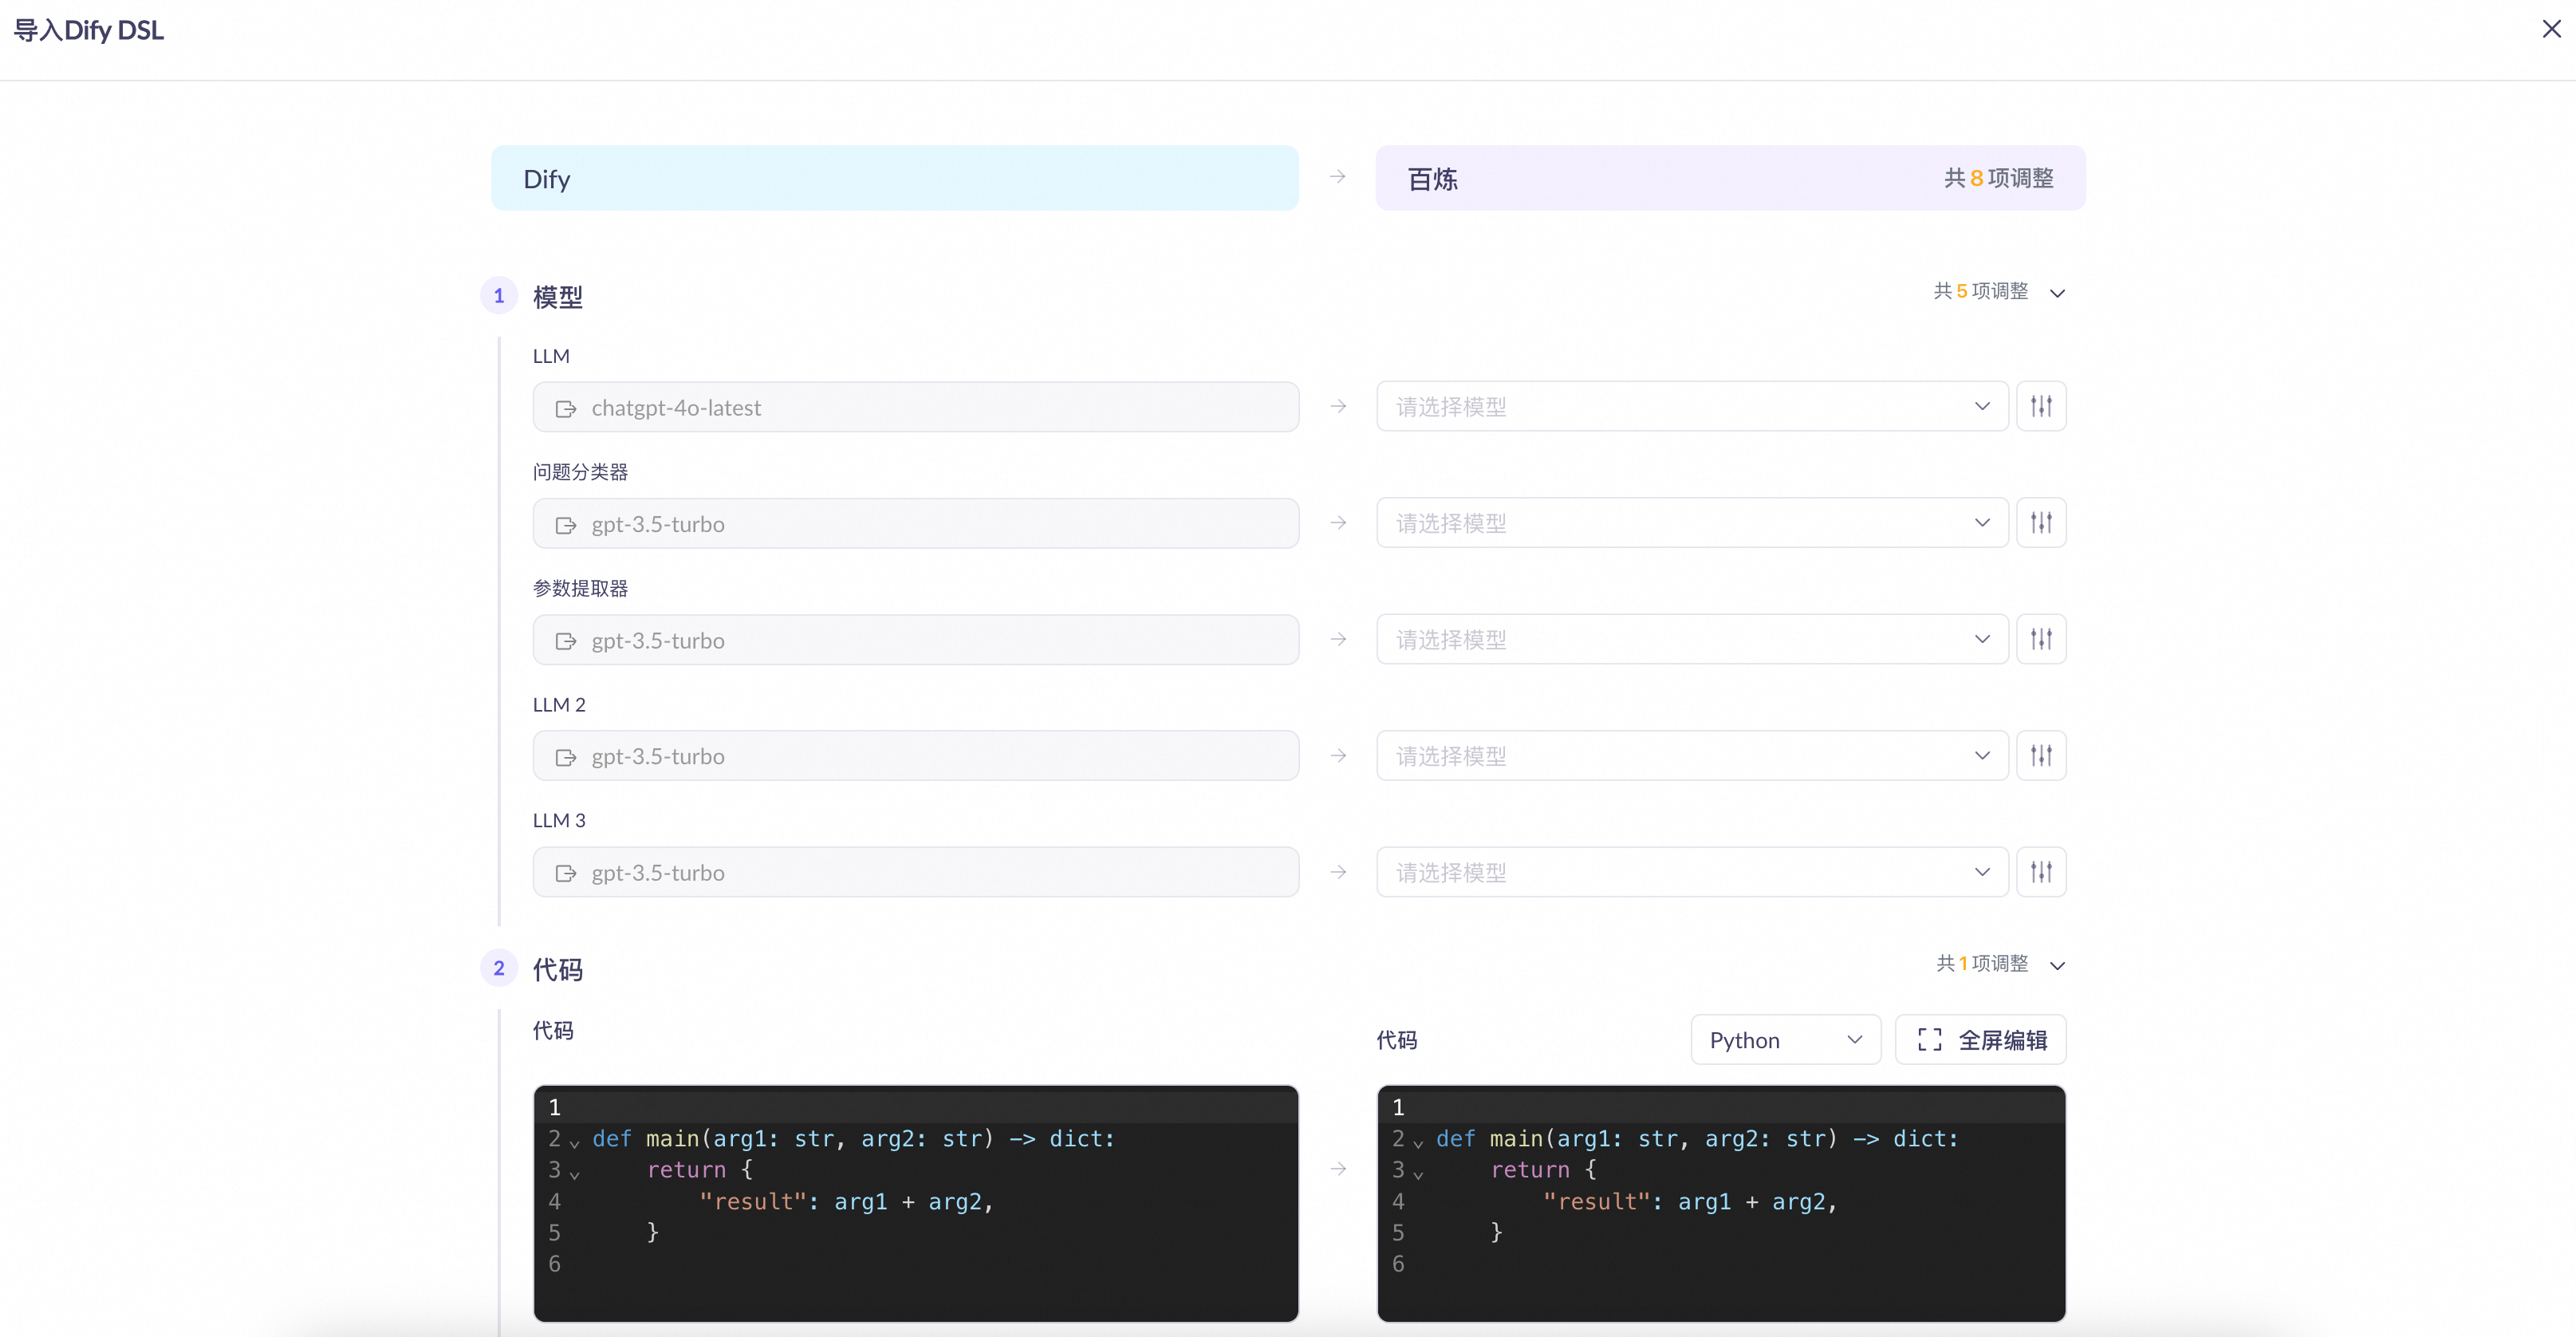
Adjust the parameters for each node.
The node compatibility details are as follows:
Dify node
Mapped Model Studio node
Compatibility
start
start
sys.querymaps toquery.sys.dialogue_countmaps tomaximum memory turns.
LLM
LLM
model: Model Studio clears the model field for unsupported models, requiring you to select one manually. Supported models are fully compatible.
prompt: Dify's System prompt maps to the main prompt in Model Studio, while its User prompt maps to the user prompt.
vision capability: Fully compatible.
context: Model Studio incorporates the raw fields from Dify's context directly into its system prompt.
knowledge retrieval
knowledge base
input: Model Studio consistently uses the
contentfield as the input.knowledge base: Model Studio clears this field after import. You must manually associate a knowledge base in Model Studio.
retrieval settings: Dify's
Top-kparameter maps tonumber of retrieved fragments.
Direct Reply
output node
Fully compatible.
agent
None
Only the name is retained. You must click the node and select a specific Model Studio node as a replacement.
Question Classifier
intent classification
Model Studio clears the model field for unsupported models, requiring you to select one manually. Supported models are fully compatible.
Iteration
batch processing
input: Maps to Batch Array.
output variable: Maps to Output Variable.
loop
loop
Fully compatible.
code execution
script
Model Studio distinguishes between Python and JavaScript scripts.
Template Transform
None
Not compatible. Model Studio generates a custom node.
Variable Aggregator
Variable Processing
Maps to the Aggregate Groups output mode of the Variable Processing node.
Document Extractor
None
Not compatible. Model Studio generates a custom node.
Variable Assignment
Variable Settings
Fully compatible.
Parameter Extractor
parameter extraction
Model Studio does not support inference mode. Other features are fully compatible.
HTTP request
API
Fully compatible, but you must re-authenticate.
List Operation
None
Not compatible. Model Studio generates a custom node.
Tool
plugin, MCP
Not compatible. Model Studio generates a custom node.
comment
None
Not compatible.
end
end
If a Dify workflow contains multiple end nodes, Model Studio converts them into a single Variable Processing node and a single end node.
-
Click the
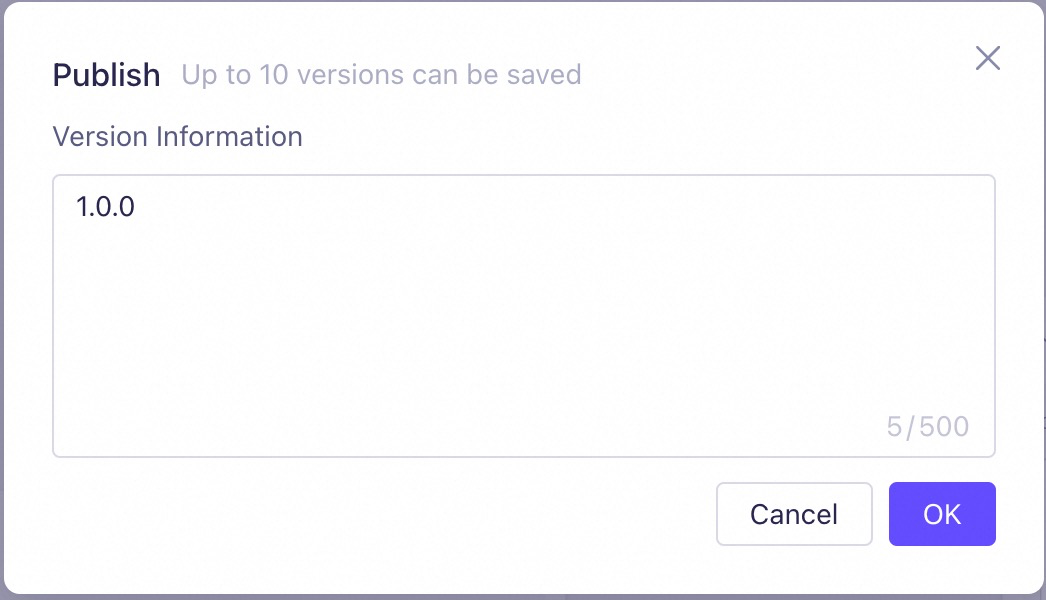
Manage workflow versions
|  |
| 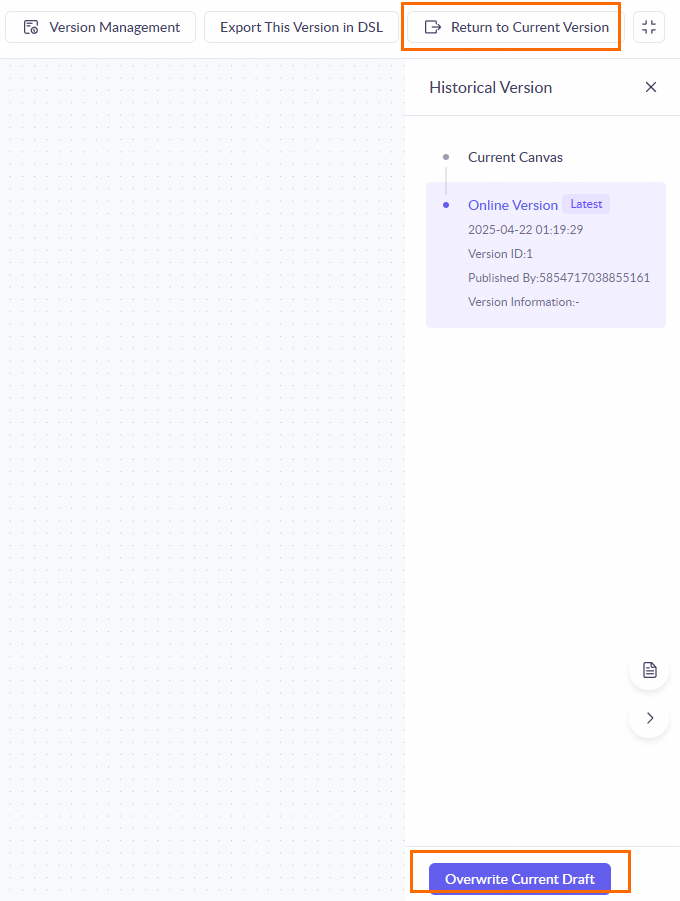 |
| 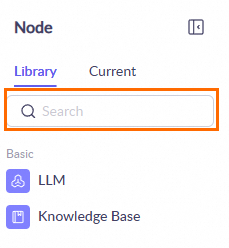 |
Delete and copy workflow applications
In My Applications, find a published application card and click the | 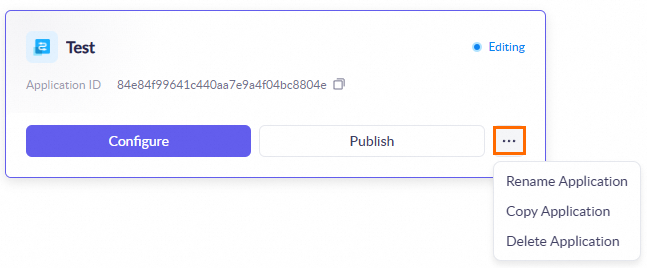 |
 icon to delete the application, copy its workflow, or modify its application name.
FAQ
- Workflow applications
- Nodes
- How do I write the results of a workflow run to a database? Use a script conversion node to write the output from the previous node to a database.
- How do I upload files when building a workflow application in Model Studio? Add an API node to your workflow application to upload files.
- How do I upload images? Use a VL model and pass the image URL as a parameter.
- Can I use an asynchronous task API within a workflow application? The timeout for a workflow application is 600 seconds. Avoid using an asynchronous task API within a workflow.
- How can I call the Model Studio workflow API from a frontend application and receive a streaming output? Frontend calls are not currently supported.
- Why can't I import a standalone .yaml file into a Model Studio workflow? Model Studio does not support importing standalone .yaml files. You must provide a compressed package that includes an MD5 file. We recommend regenerating the MD5 if you encounter issues.
- Can variable names in Model Studio workflows be in Chinese? No, variable names cannot contain Chinese characters.
-
How is conversation history stored?
Workflow applications store data for only one month. You must save your own conversation history. The
session_idis valid for one hour.